

READ OR LEAVE A COMMENT
SHARE POST

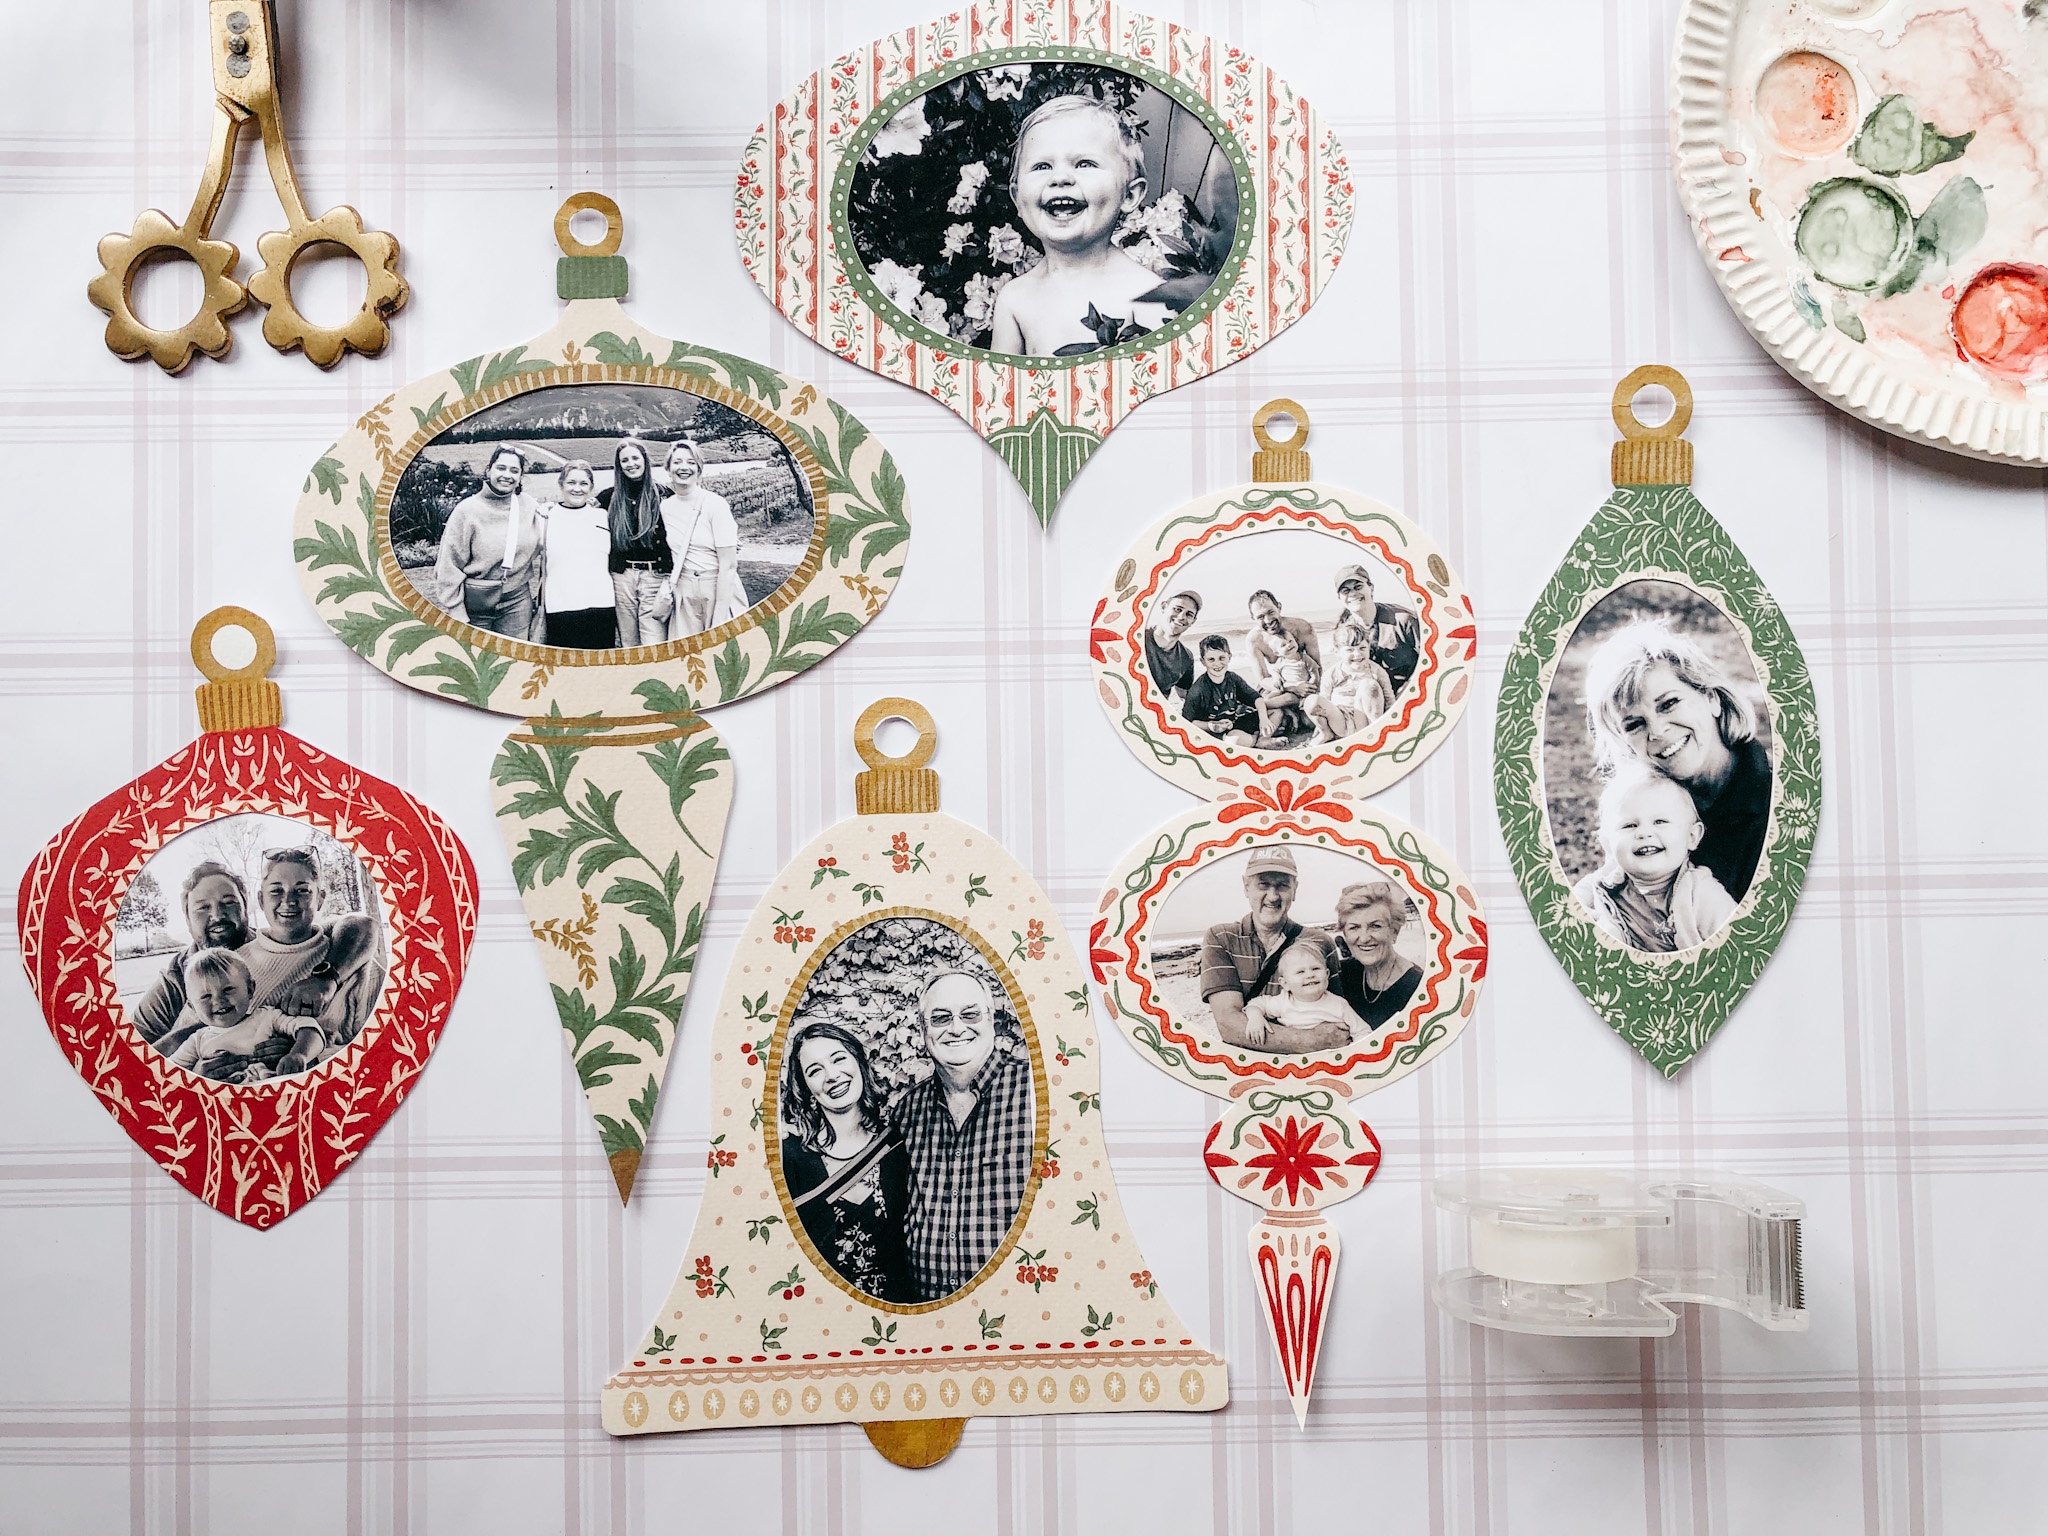
The holiday season is fast approaching, and there’s nothing quite like decorating with ornaments that carry personal meaning. Also, who doesn’t love a little holiday crafting?So, this year I’ve created these free printable photo ornament frames! 🎄💖 Perfect for displaying your favourite memories or family members these photo frames make for a heartfelt addition to any holiday decor. They can also be used for tags, name cards for the Christmas table or hung in a garland. These ornaments are a wonderful way to keep the memories of loved ones close and make your decor truly one-of-a-kind.
I created six unique designs that add both style and sentiment to your holiday decorating. The best part? They’re easy to make with just a few simple materials. Follow along to create your own set and get ready to bring a personal touch to your Christmas tree this season!
MATERIALS
Here’s what you’ll need to make your photo ornaments:
-
Free Printable Photo Ornament Frames (download here)
-
Cardstock (180-250gsm)
-
Printer
-
Scissors or craft knife
-
Photos (roughly size them to fit the frame before printing)
-
Glue or tape
-
Ribbon or twine for hanging
-
Hole punch (optional, depending on your preferred hanging style)


Step 1: Download & Print the Ornament Frames
Click the download link below to access the free printable photo ornament frames. Print the designs on sturdy cardstock to ensure they hold up well on your tree.
[Download the Free Printable Photo Ornament Frames]
Step 2: Cut Out the Frames
Using scissors or a craft knife, carefully cut along the edges of each ornament. The frames have an inner cutout for the photo area, cut that out as well.
Step 3: Prepare Your Photos
Choose the photos you’d like to feature. Make sure they’re roughly sized to fit inside the frames. Cut out the photo after tracing it with a pencil to make sure it’s the right shape.
Step 4: Attach the Photos to the Frames
Place your photo behind the frame so that it shows through the cutout. Use glue or tape to secure the photo to the frame. Make sure it’s centred and positioned just right!
Step 5: Add a Ribbon or Twine
Use a hole punch at the top of each ornament, then thread a piece of ribbon or twine through the hole. Tie a loop so it’s ready to hang.
Step 6: Decorate Your Tree, Gift or Table!
Your ornaments are ready to hang! Place them on your tree or around your home to add a touch of warmth and sentiment to your holiday decor.


WHY I LOVE THIS HOLIDAY DIY PROJECT
Not only do these frames bring a personal touch to holiday decorating, but they also make lovely gifts for friends and family. Print a few extras to share with loved ones, or have the kids make their own special ornaments for the tree. The designs add a bit of whimsy and elegance, making each ornament a unique piece of your holiday celebration.
Happy Decorating! 🎄💖
I’d love to see how you style your ornaments! Share your creations on Instagram and tag me so I can see how you’re celebrating the season with a personal touch. Here’s to creating and cherishing beautiful memories—one ornament at a time.


Thanks for these! What a wonderful way to add more physical photos to our home!
I am really excited to give this a go!!
Hi,
The watercolor photo ornaments are beautiful and just what I have been looking for. I downloaded the file and printed them full size to see how they would work for the photos I was planning to use. To my surprise all the ornaments printed out in shades of green, none were red. I did check my printer ink before starting and all cartridges are full. Any ideas why this might happen? You are a very talented artist.